Page Menu
General
- Background and Screen Shots
- SYSTEM Command
- PDRIVE Command
- /SYS File Guide
- DOS Routines
- NEWDOS/80 Quick Reference (HTML)
- NEWDOS/80 v2.0 Full Manual (HTML)
Zaps
Tips and Tricks
- Booting NEWDOS/80 v2.0 on a Model 4P
- NEWDOS/80 v2.0 Other-DOS PDRIVE Settings
- Setting HIMEM from NEWDOS/80 v2.0 BASIC
- Make a /CMD File into a Model III Self-Booting Disk using NEWDOS/80
- Trading Files Between LDOS6.2 and NEWDOS/80 v2
- Getting Tandy 15MB to work with NEWDOS/80 v2.5 (PDF)
Commented Disassembly
Background
NEWDOS/80 v1.0
x1000.jpg)
Advertisement
(80 Micro – May 1980)
x500.jpg)
Advertisement
(80 Micro – Aug 1980)
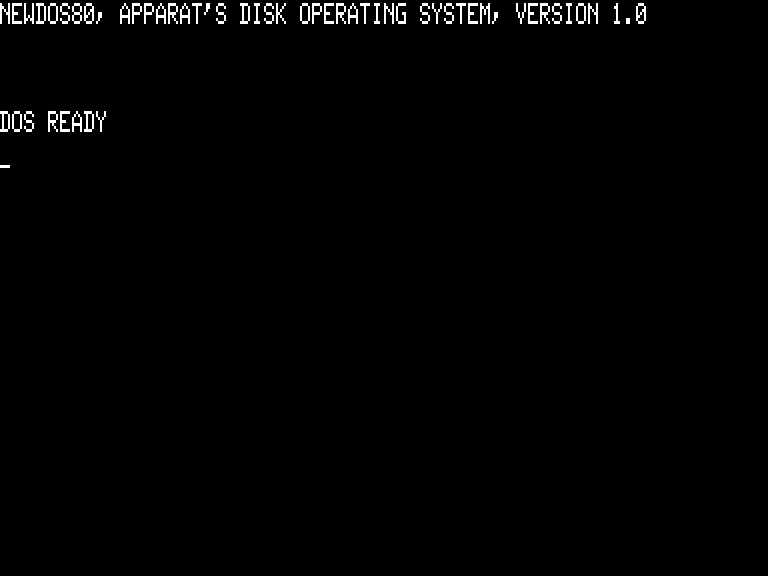
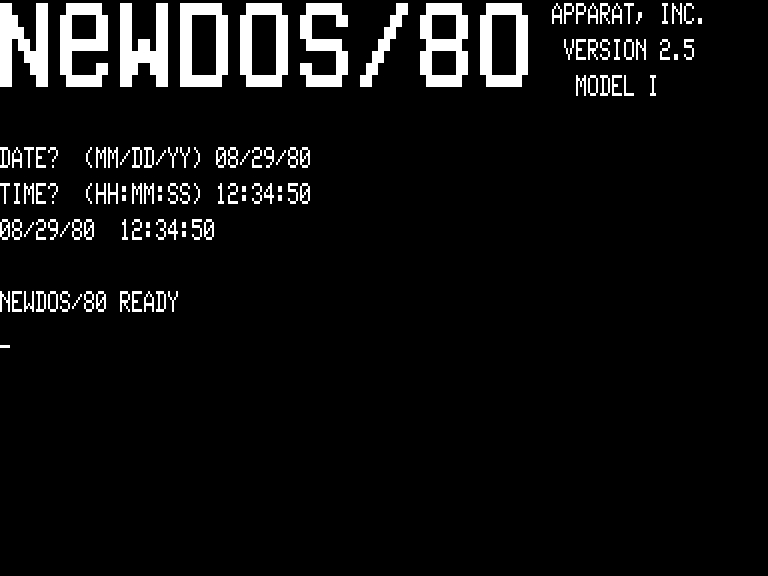
Bootup Screen
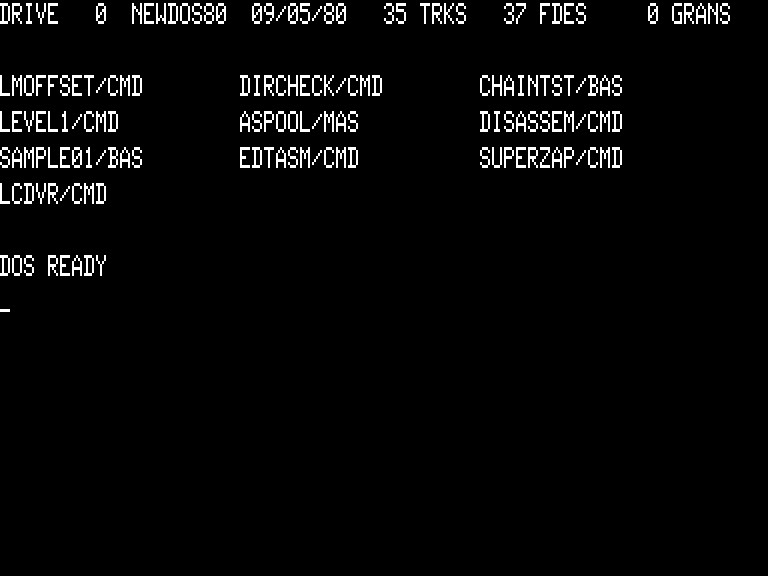
Directory Screen
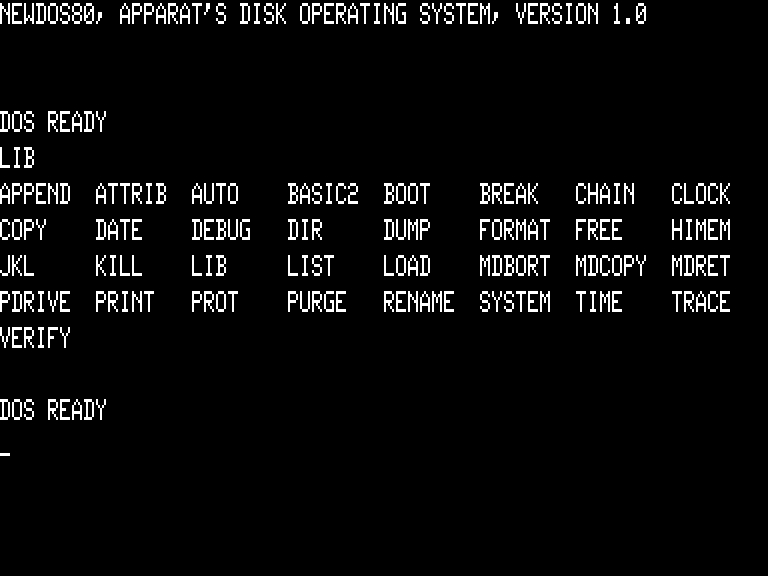
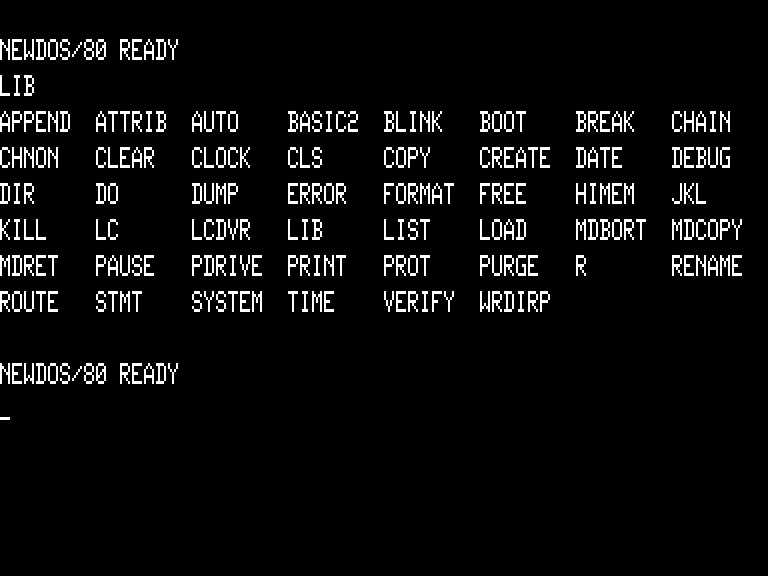
Library Screen
NEWDOS/80 is a Disk Operating System for the Model I and Model III TRS-80 made by Apparat, Inc. and released in June 1980.
Initially released for $149 around May 1980 as the successor to Newdos 2.1, it was another alternative to the notoriously fickle (and unreliable) TRSDOS which was shipped by Radio Shack, NEWDOS/80 offered a more versatile and user friendly experience. For those itching for the good old days of LEVEL I, NEWDOS/80 v1.0 included, as part of its software suite, a LEVEL I emulator!
Two of the most powerful NEWDOS/80 commands were SYSTEM and PDRIVE, the former allowing significant DOS customization options and the latter allowing significant disk format and disk interface options.
One of the best features of NEWDOS/80 was MINI-DOS. By simultaneously pressing DFG on the keyboard, you could enter a smaller version of DOS to check directories, free space, and other functions. You could do this from BASIC and any program which did not disable interrupts or take control away from the keyboard device control block (as DOS would not see the keypresses). This feature was phenomenal in preventing one from having to save all their work, exit BASIC for DOS, run their command, go back into BASIC, and try to remember where they were. The manual explains MINI-DOS best – “When, during the execution of a main program, the operator would like to interrupt the main program, execute one or more of the DOS library commands, and then resume main program execution without any changes having occurred in the main program’s state during the interruption. To execute MINI-DOS, simultaneously press the DFG keys (but not durlng disk I/O), and execute the DOS command. Anv DOS library command can be used except APPEND, CHAIN, COPY, FORMAT, PDRIVE, AND SYSTEM. Single file copy can, however, be executed with the MDCOPY command.”
BASIC was modified as well to support renumbering (which previously required third party software) and variable and line number cross referencing using the REF command.
NEWDOS/80 v2.0
x2000.jpg)
Advertisement
(80 Micro – Jun 1981)
.jpg)
Original Diskette

Bootup Screen
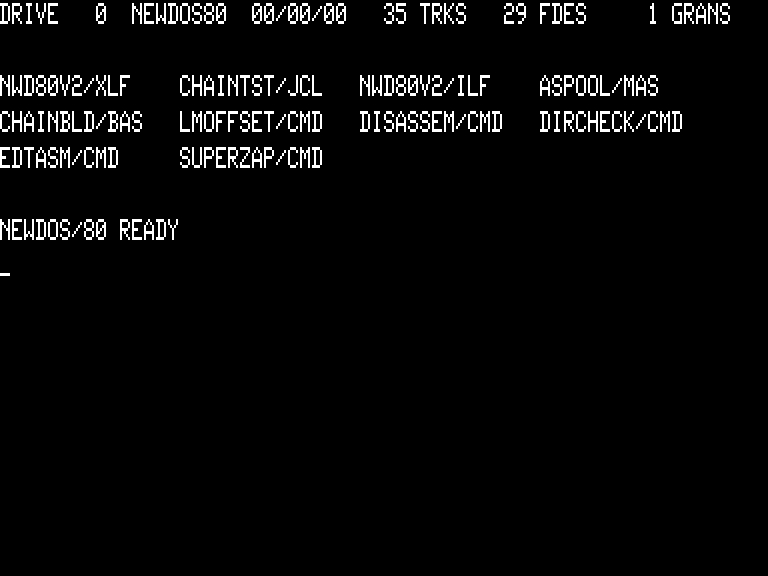
Directory Screen
Library Screen
NEWDOS/80 v1.0 was wonderful when compared against TRSDOS. As other competing alternative DOS’s came on the scene (such as LDOS), however, NEWDOS/80 v1.0 started to pale.
As a result, Apparat released NEWDOS/80 v2.0 in June of 1981 at a retail price of $149.00, featuring upgrades to the operating system which leave NEWDOS/80 as one of the few true standout DOS’s for the TRS-80.
According to Apparat, the v2.0 updates were:
- Single and/or double density operation supported.
- Single and/or double sided drive whose diskettes are treated as a single volume.
- 80 Track disk drives can read 35/40 track diskettes.
- Mix and match 35, 40, 77 and 80 track disk drives.
- Single density 8″ disk drives supported; double density it CPU speed is equal to or greater than 3.55 MHZ.
- CPU speeds to 4 MHZ ok. (CPU slow down, if required, is NOT supported by NEWDOS/80).
- Lower case, blinking cursor and repeat key software built-in.
- Model I to/from Model III file portability under NEWDOS/80 Ver. 2.0.
- Enhanced copy features (28 different parameters available).
- Single drive, two diskette file/diskette copy.
- Copy to or from Model III or Model I TRSDOS diskettes, but will not directly operate with TRSDOS Model III or Model I 2.3B diskettes.
- MINI-DOS (allows DOS commands while user program is executing).
- SUPERZAP (a diskette display and modify program).
- DIRCRECK (validates directory integrity).
- Built in RENUMber, variable REFerencing.
- Enhanced BASIC functions including five new disk I/O file structures.
- Dynamic MERGing, DELETing, variable passing.
- Dynamic merge and delete
- Double density support (Model I with Percom and LNW Doublers)
- Mix double and single density drives
- Routing commands to send display, printer and keyboard to other devices or to a main memory location
- Disassembler will dump source code to a disk file
- Repeat function for keyboard entry
- Copy by file for single drive systems and for system files
- Copy by file with non-system disk in Drive 0
- Expanded Directories for system disks
- Create pre-allocated files
- Clear command to reset Route. Himem. Mem and others
- Forms command and Set Com RS-232 for Model III
- Chaining files may be created from SCRIPTSIT
- Chaining greatly expanded with new features
- Date and Time saved thru non-power on reset
- Copy and Format allow default to system date
- Page scrolling while in BASIC
- Mostly upward compatible with TRSDOS 2.3 Model I
- Limited compatibility with TRSDOS Model III
- All NEWDOS systems maintain Model I type directories
- Model III can read and write TRSDOS Model I disk after conversion
- Global variables
- SUPERZAP & DEBUG “Find” features
- Selected copy by file for: User Files – Updated Files – Data Files
- Keep/Erase
NEWDOS/80 v2.0 included a handful of utilities as follows:
- DIRCHECK would examine and repair a director, as well as provide extra file information.
- LMOFFSET (Load Module OFFSET) would allow you to tranfer a machine language (SYSTEM) program from cassette to diskette. In doing so, however, the program would be modified to be relocated to a different area of memory. Of course, functions within the program which still relied on tape I/O would no longer work, as the interrupts necessary to disk I/O would not be disabled (as is needed for tape I/O). Radio Shack offered “TAPEDISK” to do the same thing, but LMOFFSET did it much better.
- DISASSEM would disassemble a machine language (/CMD) file. One of the most important options was to save the source to diskette, which would then allow you to modify and possibly recompile.
- SUPERZAP could be used to modify disk and file sectors.
- EDTASM was a disk based version of Tandy’s machine language programming environment Editor/Assembler.
- ASPOOL (written by H.S. Gentry) was a printer spooler which, when enabled, would spool print jobs to DISK instead of sending them to the printer which would free up the computer for other tasks.
- CHAINBLD was a program which would aid in creating Job Control Language (/JCL) files to allow for (limited) batch operation.
The DOS consisted of 14 overlay modules and BASIC consisted of one program and 8 overlays. Depending on your needs, you could delete unneeded overlays and free up some disk space. A breakdown of the /SYS files and their purposes is found here.
One feature of note was the updated COPY command, which could be used to copy files as well as whole disks, was extremely powerful. There were options to format the destination drive (FMT) or leave it as is (NFMT), warn if the destination drive has files (N) or just go ahead (Y), prompt for disk mounts (for those with fewer drives than needed) or not (NDMW), custom source pdrive specifications (SPDN=x) and custom destination (DPDN=x) so that you wouldn’t have to change your PDRIVE table just for the copying function, checks based on the source drive password (SPW=x) or the destination drive’s name (ODN=x) with prompting (DDND), options to keep the destination disks name (KDN) and date (KDD) or to use the source disks date (USD). While there were no wildcards available, you could instruct NEWDOS/80 v2.0 to copy by file (CBF) and then to choose only user files (files which were not system and not invisible) (USR), by a specific extension (/ext), only updated files (UPD), files in a pre-created text list (ILF=x), and files NOT in a pre-created text list (XLF=x).
Three hot-key combinations were also present: [1][2][3] involked DEBUG, [D][F][G] invokled mini-dos, and [J][K][L] printed the screen. There were third party programs which could be run which would convert screen graphics to MX-80 graphics if JKL was hit.
NEWDOS/80 v2.5
Boot Screen
PDrive Screen

Directory
NEWDOS/80 v2.5 was released adding Hard Drive support to the operating system. It required 48K of RAM and Apparat stressed in its marketing materials that the only diferences between v2.0 and v2.5 was hard drive support. Only registered owners of NewDOS/80 v2.0 could purchase NewDOS/80 v2.5.
Apparat’s press release announcing NEWOD/80 v2.5 said the following were added to v2.0.
- Support for Apparat 5, 10 and 15 Mb Bard Drives as well as Radio Shack’s 5 Mb Hard Drive.
- Available for Model I or Model III
- Includes hard disk formatting program (HDFMTAPP)
- Includes hard disk backup and restore utility (HDBACKUP)
- Supports file sizes of over 16,000,000 (million) bytes
- Expanded directory can now have 246 user files
- Expanded PDRIVE supports up to 8 hard drive volumes
- Ability to divide hard drive into one or more data volumes
- Use the hard drive as a system or data volume
- Data volumes may contain up to 65535 sectors
- Volumes defined under Model I can be accessed under Model III and vice versa
- Upgrade price is only $60.00
NEWDOS/86
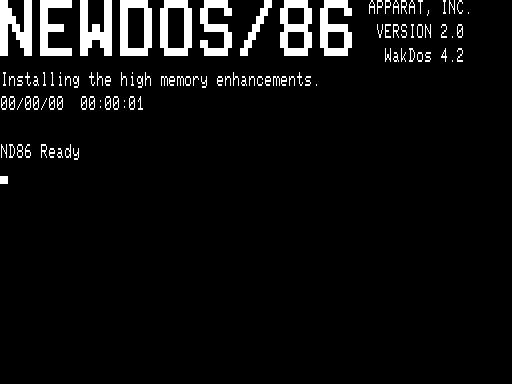
Boot Screen
NEWDOS/86 was written by Australian software author Warwich Sands. NEWDOS/86 provides a substantial set of new features.
The original NEWDOS/80 distributor, APPARAT, released many versions such as NEWDOS, NEWDOS+, NEWDOS/80 V1, NEWDOS/80 V2, and then V2.5 with hard drive support. Soon thereafter, Apparat disconnected its phones and vanished. There is no M4 version. But, NewDos86 does support some M4 hardware features from M3 mode.
You need to own NEWDOS/80 V2 and know it from its manual of some 290 odd pages. The NEWDOS/86 manual of about 160 pages covers the enhancements. Freebee goodies that came with NEWDOS/80 like EDTASM version or SUPERZAP/CMD are not part of NEWDOS/86. They could be used from ND80V2 versions. NEWDOS/86 has its own add on of utilities and document files.
If you can’t get the Apparat manual, then what? NewDos86 has an excellent on the disk HELP system that could get pretty far in casual use of the DOS in a pinch. HELP starts from almost any running program by holding down SHIFT and 123 keys together. It is easy to follow at first sight.
New Features:
- SYSTEM options: 27 new ones added to 30 old ones. Many can install optional features. Typahead, for example. A program called PATCH/BAS leads you through painless prompts on most of the new ones, and also fixes certain utilities if present for NewDos86 changes. BASIC: 51 new keywords added to 127 old ones; ELE enhanced line editor. DOS has at least eight new commands plus many enhancements in ATTRIB, BOOT, CLEAR, DATE, COPY, DIR, FORMAT, FORMS, FREE, PDRIVE, and PURGE. There are a number of separate new utilities like HELP and a RAM drive.
- Memory use: Like NEWDOS/80, NEWDOS/86 reduces the RAM cost of add ons in part by disk overlays. However a configuration using most new features all at once did eat up nearly 4K in low RAM plus 4K in HIMEM vs ND80V2. HIMEM ones can all be temporarily cancelled by doing BOOT with SHIFT key depressed, getting HIMEM FFFFH.
DOS enhancements and additions
- There is an optional editor for DOS commands. When you get an error message, the cursor comes on the incorrect command and can be changed. It works much like the old BASIC EDIT, but using the CLEAR key with EDIT keys like <D> DELETE. A shifted BREAK key aborts the command. The CLEAR key no longer clears the screen unless used with SHIFT. The DOS command SLEEP will blank the screen completely, but not lose its contents.
- DIR is vastly revised. It sorts alphabetically. Slow on a first pass if the directory is excessively large, it goes fast the next time. A utility SORTDIR permanently sorts, and can be used on many types of foreign disks like LDOS etc. DIR has a number of new letter options. For instance the unique DIR K lists only KILLED files. UNKILL restores them if possible! DIR X or OLDIR gives the old type of unsorted listing. Almost two manual pages describe partspecs to get or omit selective listings.
- A foremost new feature is ADFR: automatic format and density recognition. It can without any warning read many alien formats including LDOS and any kind of TRSDOS or LSDOS. It can by and large even use those formats as data disks. TRSDOS 1.3 is limited to only DIR and FREE and COPY usage. ND80V2 had been COPY only for TRSDOS 1.3 and no access at all to the others. ND80V2 and NewDos86 allow changing of many parameters in their own format. For ND80V2 this can be a trap as it can’t read one not defined exactly right by change of PDRIVE table. NewDos86 makes this almost wholly automatic and convenient with PDRIVE rarely needed at all. A new LOGON command helps for problem cases to tell the system disks the number of sides to ask for.
New DOS Commands
- ATTRIB myfile,PSF=Y helps arrange a pseudo system file that can be set up to load as an overlay like system files can. Users may need the (separate) technical package sold for NewDos86; there is also a separate hard drive package.
- DAY prints date on screen.
- LOGON, tells the system about drive capacities.
- OLDIR gives DIR in the old style.
- SETSYS with SYSRES and RAM can set up a system RAM disk.
- FORMAT 4 then RAM 4 set up a 64K RAM disk for any purpose on an 128K machine.
- SLEEP saves and blanks the video.
- UNKILL restores a killed file.
- VID sets up 80X24 displays if on a Model 4.
- SORTDIR alphabetically sorts entries on the DIR/SYS itself for alphabetic listings.
- To create a 39T DSDD version, the following commands were used: PDRIVE 0 9=0,A then PDRIVE 0 9 TI=CK TD=G TC=39 SPT=36,A then COPY 0 0,,DPDN=9. That did a one drive copy using table entry 9 for DPDN, destination PDRIVE number. A second drive if present would have made it easier. M4D on which I have several DS drives has never made a usable M1 39T format. It has however duplicated M1 disks when skipping a FORMAT step that the M1 already had done. This also worked on NewDos86, going from 35T source to 39T with prior format under NEWDOS/86 on M1. On the M4D I mounted the 35T source on :1 and a 39T with FORMAT already done by M1. A LOGON command was used with option to reset PDRIVE table specifics after successful disk IDs. COPY 0 1 and <N> for no new format then made a working M1 disk with 39T. There was an alarming tail end message of DIRECTORY ERROR, but it meant nothing.
Enhanced BASIC
NEWDOS/86 also made ENHANCED BASIC enhancements thanks to Warwick S. Sands and D.S. Sands. First developed some years ago as a tape patch, it is still available in PATCH versions for various systems.
EDIT works much as it always did, if you want it to. In its ELE EXTENDED LINE EDITOR mode there is a full screen editor with its own commands works well. You can even split a line into two new ones, or paste two together. Keys can be defined to type at least 26 keywords: eg shifted <G> to type GOSUB. Linelength can be 255 bytes, not just 240. ND80 commands DU or DI to duplicate or move single lines will work for blocks of lines in ND86.
If you get NEWDOS/86, there’s more than enough new BASIC to keep you up all night. For starters, here is a simplified list of new keywords and commands. Arguments in most cases can be a constant or variable or expression:
- AND$(A$,B$) ‘Logical bit test on strings
- BASIC !300 ‘From DOS – reserve LOWMEM
- BEEP N1,N2 ‘Notes on miniamplifier
- CALL X USING A%(0) ‘USR call w/Z80 regs
- CASE … ENDCASE ‘Alternate to IF THEN
- CHR$(64) ‘Cancel CHR$(23) w/o CLS
- CMD ‘Same as CMD”S – GOTO DOS
- CMD”F=POPx” – ND80 stack purge improved
- DEC X ‘Same as X=X-1
- #DO A$ ‘A$ can be BASIC command
- DO … UNTIL ‘Type of looping
- #DRAW S X1,Y1 TO X2,Y2 [TO X3,Y3 TO …
- #GOTO N ‘Or #GOTO N*10 etc.
- EDIT ‘New full screen processes
- ERR$(N) ‘=> Any ERROR #N
- ERROR N ‘Ditto
- FIELD@6441,A$ LEN 5 ‘A$ =>”READY” on ROM
- FILL 6441,5,15360,64’=>READYREADY on vid
- X=FCB(1) ‘X=ADDRESS(File buffer #1)
- INC X ‘X=X+1
- INPUT @512,>”Enter name & age”;N$,A
- INPUT TO @512,”Phone number”;A$;USING B$
- INSTR(!A$,N,TF) ‘Bit testing in string
- KTA=A$ ‘Set typeahead status with flags
- $LET A$=UPCASE(A$) ‘Convert letter case
- A$=LSTRIP(” A BC”,32) ‘=> A$=”A BC”
- LINE LET A$=HI, “SAM” ‘A$ contains ‘”‘
- X=MOD(8,3) ‘X=2, remainder of 8/3
- #MOV &H3C00,&H3E00,512 ‘Duplicate bytes
- #PLOTS A%(0) @ (64,24) ‘Array drawing
- PRINT @[16,32],A$ ‘@[row,column] works!
- A$=OR$(B$,C$) ‘Bitwise string logic
- #RESTORE N*10 ‘RESTORE at calc. line #
- #REV ‘Graphic pixel & blank inversion
- A$=ROT$(“ABCDE”,2) ‘Rotate 2 => “CDEAB”
- $=RSTRIP(“A BC “,32) ‘=> A$=”A BC”
- SETKEY G=GOSUB ‘Then <G> key types GOSUB
- A#=SUM A!(0),10 ‘Add 11 array elements
- #SWP 15360,15872,512 ‘Swap 512 bytes A$=”12345″:$SWP A$,1,3,2 ‘A$=”45312″
- ?UPCASE$(“abcd”) ‘=>”ABCD”
- USR0= … Z80 program bytes …
- VID(80) ‘=> 80X24 screen
- WAIT @512,>”Hit ENTER”;CHR$(13)
- WHILE … WEND ‘Type of looping
- X=WPEEK(&H4001) ‘Two byte PEEK
- WPOKE &H4001,X ‘Two byte POKE
- N=XOR(8,24) ‘N=24, BOOLEAN XOR
- ?&O77 ‘=> 63, octal to decimal
- ?&1111 ‘=> 15, binary to decimal
- ?&D15360 ‘=> 3C00H decimal to hex
- A$=”3C00″:? &H(A$) => 15360
- ?&! -1 ‘=> 65535, unsigned INT
- ?&% 65535 ‘=> -1, signed INT
What’s the best thing here? That depends on your tastes. To many it may be new INPUT controls which the author explains in a dedicated chapter can save a lot of conventional INKEY$ logic. There is position control with @ position by count or by column and row. The ;USING B$ sets maximum keying LENGTH.
There are many simple new tools: string operations, conversions of number bases, two byte PEEK and POKE, and others.
For debugging: no more UNDEFINED ERROR message – info is complete, and has new functions that PRINT can use. Not shown above is a programmed SETKEY usage that can define “hot keys”. The defined keys can work like a BREAK as an interrupt at any time, and can be set up for some error service subroutine you write using GOSUB via a hot key. The ND80 CMD”F=POPx”,line usage that purges GOSUB stacks has been extended to work on the new structures: CASE, WHILE, and DO … UNTIL. NOTE: DEBUG is entered in ND80 by pressing 123 keys together, and <G> exits. <M><address> to type until ENTER. <+> or <-> to page.
Positioning: Any usage such as PRINT @512 now also can be done in M4 fashion by column and row like PRINT @[8,0]. The braces must be SQUARE ones, unfortunately, the [] set, normally not typeable. I think it takes a special KBD driver or a word processor, or else I’ve missed some common knowledge. To test these in a program, I typed them via DEBUG.
80X24 Video: works if you install driver, via VID command when in DOS, the in BASIC execute VID(80). It works during a RUN after the VID(80), but reverts to 64X16 when you STOP or if stopped in command mode. VID(64) switches back while running.
80X24 support works for any PRINT or SET/RESET/POINT, or #DRAW,
#PLOT, or #REV … full support. Maximum @ coordinates go up to row 23, column 79 for row,column. However PRINT@ still is limited to 1024.
Graphics: #DRAW S 0,0 TO 159,0 TO 159,71 TO 0,71 TO 0,0 is an example that if in 80X24 mode almost instantly draws a pixel border on the video edge. MAX SET coordinates go from 127,47 to 159,71 when changing modes via VID(80). The same technique could be used to draw anything like the explicit way above, or with variable coordinates stored in arrays, etc. The flag letter “S” is for SET, R RESET or X for XOR (invert). #REV inverts the whole screen, including nongraphic blanks. PLOTS A%(0) @ (X,Y),size,rotation is a more elaborate and efficient tool. The array can be built with program PLOTMATH/BAS and uses 5 bits per pixel set: 5 bits sometimes for up to 32 pixels of same direction repeat. Size or rotation params if used can make the object larger, or turn it eight ways.
Memory manipulation: MOV, #FILL, and FIELD @ provide powerful tools. MOV handles overlapping moves, but #FILL does not. The string command FIELD @ defines a string anywhere in memory. You could for instance use it to point to ROM and then PRINT# to disk for a literal ROM image file.
Among the best additions for those of us who would use them are new USR tools. For the more advanced, an overlay file can be established from DOS, much like a system overlay. BASIC !n such as BASIC !500 on entry reserves the specified bytes below file buffer #1 for any purpose. Two other forms if used will eliminate need of DEFUSR. CALL X USING A%(0) calls address X and passes all 10 Z80 register pairs to and fro in the array. USR0= … Z80 code … on the end of a line when executed defines the byte after equals sign as USR0. How to get the untypeable bytes in place? Various methods could be used. You should type some typeable placeholder bytes first like “*** .. ” in place of Z80 code. In ND86 if you execute the USR line then type 123 for DEBUG, it lands on the start of the to-be USR literal. Then you could type the HEX there. <M><addr> to start typing, ENTER to stop, and <G> to return to BASIC. If you have any line already in a form A$=” … Z80 code … then ND86 has a special CONVERT process to convert it for you.
NEWDOS/90
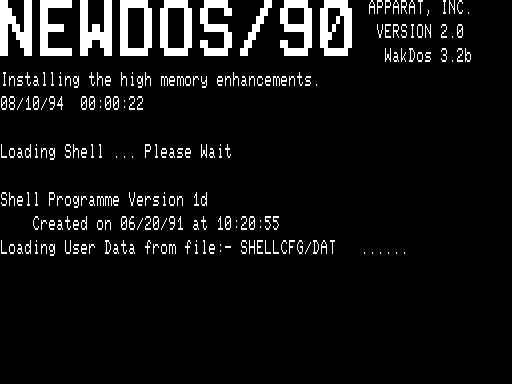
Boot Screen
NEWDOS90 was an update to NEWDOS86. They chose this name because some changes have been made to the SYSTEM file usage. PDRIVE and SYSTEM, which use to occupy their individual /SYS files, now share a single /SYS file. This freed up a directory entry which is now used for a shell program.
The most visible change is a shell instead of a DOS prompt. If you find yourself at a DOS prompt, you can invoke the shell by entering *.
Other changes include:
- A HELP command was added
- SHIFT+JKL causes a form feed (ASCII character 12) to be sent to the printer
- A POKE command was added to DOS. The same formats from NEWDOS/86 were kept (i.e., you POKE,[W] exp1,exp2
- DOS ignores leading and trailing spaces
- The default quote character can be changed to !”#$%&'()
- Multiple DOS commands are allowed on each line
NEWDOS/80 v3.0
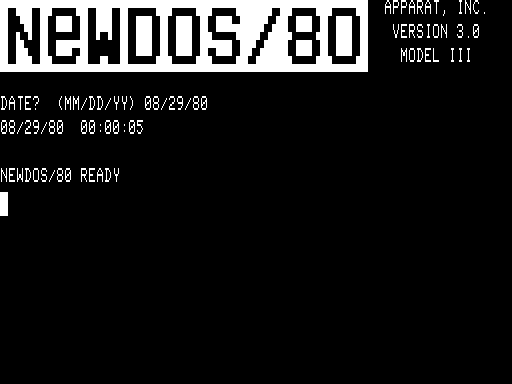
Boot Screen
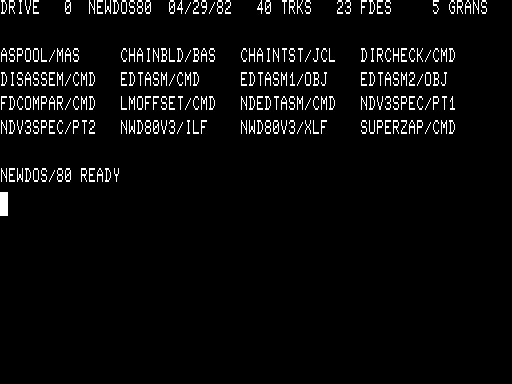
Directory
This DOS has appeared in the wild. I am unsure as to where NEWDOS/80 v3.0 came from.
SYSTEM Command
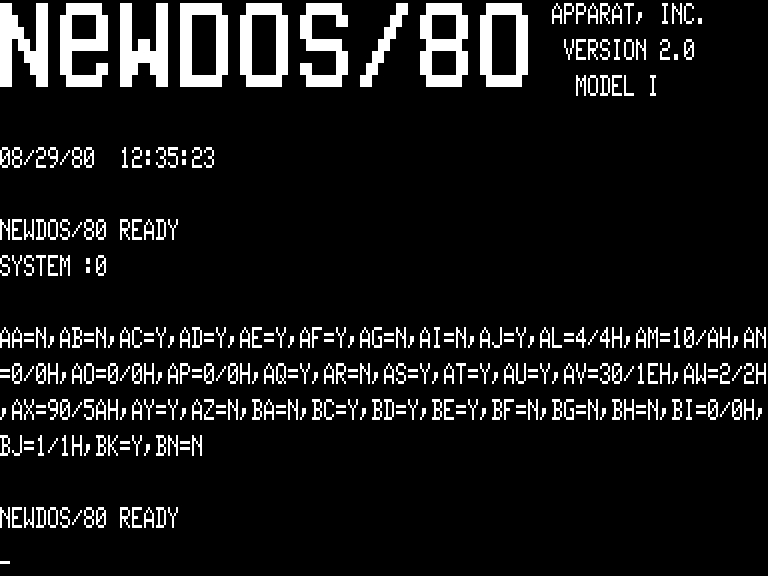
System Screen
The SYSTEM command allowed for customization as to many parts of the NEWDOS/80 v2.x operating system.
From the manual:
USE: SYSTEM,pwdn1,options.
PURPOSE: Change and/or display the system options in the control sector of the system diskette mounted on drive dn1. These options determine the system configuration at subsequent re-boots when this diskette is the system diskette.
The SYSTEM commands are as follows:
AA=yn Passwords enabled?
AB=yn Run only mode enabled?
AC=yn Keyboard debounce enabled? (Model I only);
AD=yn JKL for screen print enabled?
AE=yn 123 for debug enabled?
AF=yn DFG for MINI-DOS enabled?
AI=yn Lower case mode installed? (Model I only);
AJ=yn DOS”s keyboard intercept routine enabled? If N, see manual for side effects, especially Chaining;
AL=al al = the number (1 to 4) of physical drives in the system;
AM=am am = disk I/O tries (i.e. 10) before error declared;
AN=an The DIR command default drive number is an};
AO=ao Drive ao is first and lowest drive used when creating a new file where a drive is not specified;
AP=ap Default HIMEM address;
AQ=yn CLEAR key enabled?
AR=yn COPY formats 5 and 6 allowed without diskette password checking?
AS=yn BASIC input text strings forced to upper case? (Model I only);
AT=yn Chaining in byte mode instead of record?
AU=yn Use clock driven repeat key function?
AV=av If AU=Y delay av 25ms intervals before key”s first repeat;
AW=aw Number (i.e. 3) of write with verify disk I/O tries before declaring error;
AX=ax ax is the highest ASCII code for the printer;
AY=yn Ask for date and time at DOS unrecognizable reboots?
AZ=yn Ask for date and time at DOS recognizable boots?
BA=yn Set ROUTE,DO,NL state?
BB=yn Clock interrupts 50 times per second instead of 60? (Model III only);
BC=yn Operator allowed to pause or cancel chaining?
BD=yn Hold down ENTER during reboot overrides AUTO command?
BE=yn DOS command R enabled?
BF=yn Set LCDVR,yn state (Model I only);
BG=yn Set LC,yn state;
BH=yn Set BLINK,yn state;
BI=bi Set cursor character = bi (i.e. 176);
BJ=bj bj is integer CPU speed multiple (i.e. 1, 2, 3) to help DOS cope with a faster CPU;
BK=yn WRDIRP command and DIRCHECK functions W and C enabled?
BN=yn Write directory sectors readable by Model III NEWDOS/80 instead of by Model I TRSDOS (Model I only)
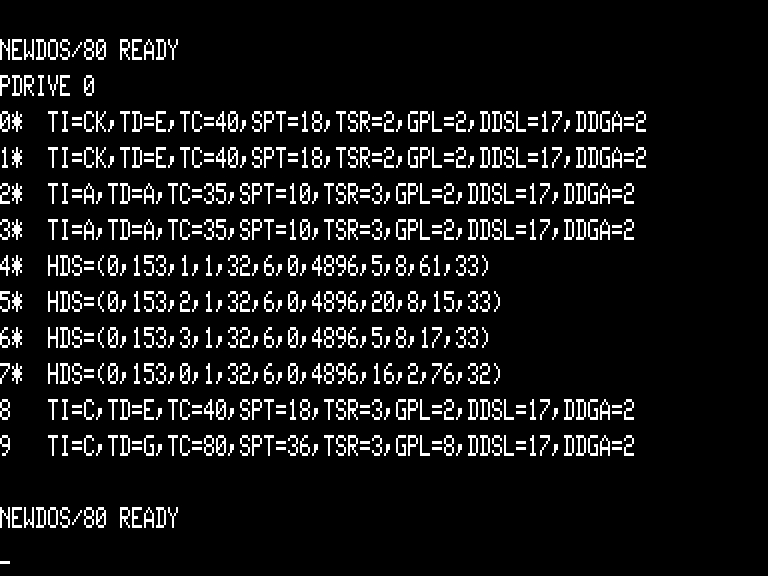
PDRIVE Command
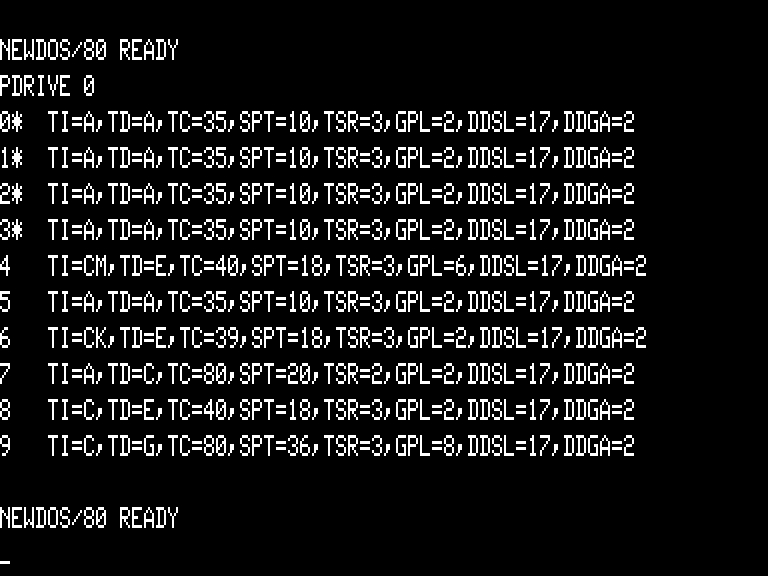
System Screen
The PDRIVE command allows for the setting, on a disk drive by disk drive basis, the type of interface, drive type, and diskette characteristcs, making NEWDOS/80 infinitely versatile when it came to reading alien formats. Of course, you needed to know the details of those formats, although there were 3rd party applications which would attempt to automatically figure that out. The PDRIVE table was written to disk, and would require a reboot after each change unless the suffix “,A” was added, in which case no reboot was required. There was also a patch to NEWDOS/80 to suffix with “,B” which would make the PDRIVE table changes in RAM but not on the disk. One major glitch in the use of PDRIVE was that, under certain circumstances, if you had mis-entered parameters so that they conflicted, the DOS would no longer boot.
From the manual:
USE: PDRIVE,pwdn1,dn2,options
PURPOSE: Update drive dn2″s data and display drive dn1 diskette”s PDRIVE table.
The PDRIVE settings are as follows:
TI=type1 Type of Interface, consisting of one or more of the following (see manual for proper combinations):
A -Standard TRS-80 disk interface;
B -Model I only OMIKRON mapper;
C -Model I only PERCOM double interface;
D -Model III only Apparat disk controller;
E -Model I only LNW type disk interface;
H -Head settle delay is to be done on drive change. Required for 8-inch drives;
I -Sector 1 is lowest numbered sector on each track;
J -Track 1 is the lowest numbered track on the diskette;
K -Track 0 is formatted in opposite density from the rest of the tracks and is usable only during boot;
L -Two step pulses between tracks are used;
M -Model III TRSDOS or Model I TRSDOS 2.3B or higher diskettes to be mounted.
TD=type Type of Drive where type values are:
A -5 inch, single density, single sided;
B -8 inch, single density, single sided;
C -5 inch, single density, double sided;
D -8 inch, single density, double sided;
E -5 inch, double density, single sided;
F -8 inch, double density, single sided;
G -5 inch, double density, double sided;
H -8 inch, double density, double sided.
TC=tc1 tc1 is the number of tracks on diskettes mounted on the drive;
SPT=sc1 sc1 is the number of sectors per track;
TSR=rc1 rc1 is the track stepping rate code. 0=5ms, 1=10ms, 2=20ms, 3=40ms;
GPL=gc2 gc2 is the number of granules ( 2 to 8 ) per lump;
DDSL=ln1 ln1 is the number of the lump whose first sector is the directory”s first sector. Used only during formatting;
DDGA=gc1 gc1 is the number of granules ( 2 to 6 ) assigned to the directory. Used only during formatting;
A If the display shows no errors, activate the PDRIVE attributes as the current attributes in main memory. Subsequent I/O will use these attributes. If A not specified, subsequent I/O (except that via SPDN or DDPN [see COPY]) will not use any new attributes until re-boot.
Method 1: Booting NEWDOS/80 v2.0 on a Model 4P – Chris Anderson
Note! This procedure is NOT necessary for a Model 4! It is only of use for Model 4P owners!
You who own Model 4P’s probably know by now that you are missing something that a Model 4 owner finds very handy – THE MODEL 3 ROM! Without that ROM, you cannot directly boot several other popular operating systems. To boot them, you must first boot using a disk that contains a file called MODELx/III. Most systems came with MODELA/III. Then you must reboot using the operating system of your choice. MODELA/III is a copy of the Model 3 ROM, and is loaded down in low memory, making it appear to the machine exactly as it would if there really WAS a ROM down there as there is on a Mod 3. By doing this, operating systems other than LDOS and CPM have the ROM routines available as needed for operation.
SO… HOW to get a 4P to boot NEWDOS directly without first having to boot LDOS, load MODELA/III, and boot again? Easy.. fool the system (what else?) The following procedure creates a pseudo-directory on a NEWDOS disk. This directory will be properly located on track 20 so that it can be found by the bootstrap routine in the 4P. Immediately following the pseudo-directory will be a copy of MODELA/III. Both will be saved together as a single file. This file will also be entered into the REAL NEWDOS directory (so we don’t accidently overwrite it with other files) and just so that you know what it is, it’ll be called MODELA/III.
So what happens? When LDOS tries to boot the disk, it finds an entry for MODELA/III in the area of the disk where LDOS looks for the directory. This dummy directory points a little further down into the file where MODELA/III actually exists! Confused? What can I say. Trust me on this one folks; it works.
Boot the system as follows using LDOS6.2 This technique is the norm for booting foreign systems on the 4P.
- Install any LDOS6.2 disk that contains the program MODELA/III, assuming you have one so prepared. If so, you will be prompted to install the disk containing the foreign system (NEWDOS, in this case) and you may skip the next step. If not, use your MODELA/III disk to boot, following step b) instead.
- Insert your MODELA/III and press the reset button. IMMEDIATELY press and hold down the F3 and P keys. You will then receive the prompt to switch disks.
- Install a VIRGIN copy of NEWDOS/80 V2 in Drive 0. It should contain the NEWDOS program called SUPERZAP/CMD and ALL /SYS files should be present.
- Set the PDRIVE for Drive 1 as follows:
PDRIVE 0,1,DDSL=29,A - Format and copy the disk on 0 to 1 as follows, using whatever you like for the current date:
COPY 0,1,11/25/87,CBF,/SYS,FMT - Remove the virgin disk and install the newly created NEWDOS disk into Drive 0. Put the virgin disk into Drive 1 so you’ll have use of the SUPERZAP program.
- Create a file entry called MODELA/III as follows:
CREATE MODELA/III:0 -
Use SUPERZAP to modify the directory entry for MODELA/III on the disk in Drive 1 as noted below. If you have used a virgin disk, you will find the directory entry for MODELA/III at disk sector 299.
change 1000 0000 004D 4F44 454C 4120 2049 4949
9642 9642 0000 FFFF FFFF FFFF FFFF FFFF
to 1000 0000 004D 4F44 454C 4120 2049 4949
9642 9642 0000 3600 FFFF FFFF FFFF FFFF
The only actual change is the 4th pair on the second line of the entry from FFFF to 3600. - Remove the virgin disk from Drive 1 and install the disk that came with your Model 4P system called MODELA/III. (Yeah, I know it’s an LDOS disk. Be cool..)
- Check to make sure your PDRIVE setting is as noted below on Drive 0, entry for Drive 4 (it will be if you’re using a virgin disk like I told you to!)
- TI=AM,TD=E,TC=40,SPT=18,TSR=3,GPL=6,DDSL=17,DDGA=2
- If not, fix it!
- Copy the program MODELA/III to the NEWDOS disk with the following command:
COPY MODELA/III:1 :0 SPDN=4 - Remove the MODELA/III disk from Drive 1 and reinstall the disk containing SUPERZAP.
- Using SUPERZAP, Copy Disk Sectors (CDS) on Drive 0. You want to copy 10 sectors from 290 to 522. This makes a duplicate directory up in an unused region.
-
Using SUPERZAP, modify the entry for MODELA/III in the “fake” directory as follows. You should find the entry in drive relative sector 531.
change 1020 0000 004D 4F44 454C 4120 2049 4949
9642 9642 3900 360B FFFF FFFF FFFF FFFF
to 1000 0000 004D 4F44 454C 4120 2049 4949
9642 9642 3900 1E09 FFFF FFFF FFFF FFFF -
Using SUPERZAP, modify the entry for MODELA/III in the REAL directory as follows. The entry will be at drive relative sector 299 like it was the first time you diddled with it:
change 1020 0000 004D 4F44 454C 4120 2049 4949
9642 9642 3900 360B FFFF FFFF FFFF FFFF
to 1000 0000 004D 4F44 454C 4120 2049 4949
9642 9642 4D00 340F FFFF FFFF FFFF FFFF -
Since you have a virgin copy of NEWDOS in Drive 1 (right?) you should have DIRCHECK/CMD on it as it came from Apparat. Execute DIRCHECK, specifying Drive 0 as the target drive. Everything being the way it ought to be, you should get the following error messages at the end of the program:
34,0 ***** GRANULE FREE, BUT ASSIGNED TO FILE(S)…
34,1 ***** “
35,0 ***** ” (Each should be shown as assigned
35,1 ***** ” to FILE(S) 67 MODELA/III.)
36,0 ***** “ -
Using SUPERZAP, go to the GAT sector (drive relative sector 290) and correct the errors caught by running DIRCHECK:
Change relative byte 34 from FC to FF
Change relative byte 35 from FC to FF
Change relative byte 36 from FE to FF
ALL DONE! You now have a bootable NEWDOS disk. When you remember what life is like without the PDRIVE command, you’ll believe it was worth it!
Method 2: Booting NEWDOS/80 v2.0 on a Model 4P – Russ McElroy
You will need two SS 40 track disk drives, NEWDOS/80 (and SUPERZAP), and a TRSDOS 6.x system disk (with MODELA/III). What we will do is create a new system file ‘SYS22/SYS’ which will consist of the MODELA/III file preceeded by a mock TRSDOS 1.3 FPDE positioned so the 4P will find it on bootup. The 4P will use this mock directory entry to locate the ROM image and will then proceed to load it, thereby booting without the use of a TRSDOS 1.3 diskette!
One caveat: The MODELA/III file supplied with LSDOS 6.3 would not work correctly. Using the original version from the 4P solved the problem. If, upon booting your zapped NEWDOS/80 system, you find yourself with no repeat keys (ie. hold down a key and see if it repeats), it is likely you’ll need to use an older version of MODELA/III.
- Boot up a NEWDOS/80 system and set up the PDRIVE table to copy the system: PDRIVE 0,1=0. Press reset to load the new pdrive info.
-
Make a backup of the NEWDOS/80 system onto a disk (taking only /SYS files) in drive 1 using:
COPY,0,1,,CBF,FMT,/SYS,NDMW -
Put the mock TRSDOS 1.3 FPDE on the new system disk using SUPERZAP.
At DRS 308, starting at byte 00 enter the following bytes:
100A 5400 004D 4F44 454C 4120 2049 4949
9642 9642 3900 1133 FFFF FFFF FFFF FFFF -
Update the GAT to reflect the space to be occupied by the SYS22/SYS file.
At DRS 170, starting at byte 1EH enter the following bytes to let the system know that this space is occupied:
FEFF FFFF FFFF FF -
Add the HIT entry for the SYS22/SYS file.
At DRS 171, byte 60H enter the following byte which is the hash code for ‘SYS22/SYS’ in the proper position so the system can locate the FPDE:
25
6. Use the CDS function of SUPERZAP to copy the 57 sectors of the MODELA/III file from a TRSDOS 6.x system disk to the new system disk.
To do this, mount the TRSDOS disk in drive 0 and copy 57 sectors from DRS 660 of the TRSDOS disk to DRS 312 of the new NEWDOS/80 system disk in drive 1.
Method 3: Booting NEWDOS/80 v2.0 on a Model 4P – The normal way
The MODELA/III file must be loaded from a diskette in the TRSDOS 1.x, LDOS 5 or LS-DOS 6.x format. The 4P Boot ROM doesn”t understand any of the other directory/filesystem layouts, and by default the NEWDOS disk format is quite different.
The normal process for booting an “alien” format diskette is:
- Insert the diskette with MODELA/III on it and press reset.
- If that diskette is LS-DOS 6, press the [3] or [F3] key within three seconds.
- Press the [P] key to indicate that you want to swap diskettes. You must also do this within the three seconds after pressing RESET. (You can press the F3, 3 and P keys in any order or all at once.)
- The system prompts to change diskettes. Insert NEWDOS, MultiDOS or whatever non-TRSDOS/non-LDOS format OS this is.
- Press [ENTER] to boot the other operating system when the new diskette is in place.
Once loaded, if you press RESET or otherwise reboot, the MODELA/III image will still be there and you can boot directly onto the NEWDOS or other Model III OS without having to swap diskettes again or pressing any other keys. If you cycle power, you will have to repeat the first procedure.
Optional keys related to Model III-mode booting are [L], which means says to load the Model III image even if it doesn’t appear to be needed, and [N], which says to NOT load the ROM-image even if it does appear to be needed.
Method 4: Booting NEWDOS/80 v2.0 on a Model 4P – Super Adventurous Way
Build a diskette with a boot sector that doesn’t look like a Model III-mode boot sector. This means the ROM won’t try to load MODELA/III at all, assuming it’s a Model 4-mode diskette. Then when the boot sector is loaded and control is transferred to it, it can do anything it wants to. You could write a boot sector that knows where to load the MODELA/III file from on this alien disk format and load it yourself before loading the rest of the OS, or you could concatenate the BOOT/SYS or SYS0/SYS modules of the operating system onto the contents of a MODELA/III file, which loaded everything as though it was one big file. Typically the MODEL%/III contents needs to be loaded first, so that later stages of the boot process will have the old Model III ROM functions available for use, such as to print those boot-up screens.
In theory, you could do the latter (build a blob file containing both MODELA/III and BOOT/SYS contents) and let the boot ROM do the work (ie load MODELA/III contents and BOOT/SYS that have been combined in one file), but it would be much easier to simply not let the boot ROM try to load a MODEL%/III file and take over things from there. You can’t make the 4P-ROM know about any new disk formats, so the best choice is to not rely on it at all for that function.
To decide if the MODELA/III file is needed, the 4P ROM scans sector 1 on the floppy diskette looking for the CD XX 00 (CALL 00XXH) instruction sequences and other clues. If it finds any, it knows the boot sector is expecting the Model III ROM image to be there, so the 4P-ROM loads the ROM image first before turning control over to the boot sector. Frequently, the only reference to the “A” ROM address range in the boot sector would be to display a message like “DISK ERROR”, but that one hit was enough to make the determination automatic. I recall that during development back in 1983, Frank Durda IV tested several dozen alien diskette formats, including all the Kim Watt stuff, looking for signatures like this.
Method 5: Booting NEWDOS/80 v2.0 on a Model 4P – Tony Domigan and Northern Bytes, Vol.5, #7, Page 14
MODELA/III can be copied to LDOS 5.x and TRSDOS 1.3B diskettes so that they can Cold Start on the Model 4P. If, however, you wish to use NEWDOS/80 version 2.0 the only option is to load MODELA/Ill with ‘pause’ and then enter your NEWDOS disk – two operations not very convenient. Furthermore, the Model 4P hardware seems to check the boot sector (sector 1) in a way which excludes any DOS other than TRSDOS or LDOS.
The method I have used relocates the NEWDOS directory to lump 36 i.e. track 20; the same track on which the LDOS directory resides,
The FPDE for MODELA/III is created and the directory entry modified so that when the file is copied from the TRSDOS MODELA/Ill disk it will be copied to a true track. I have used track 30 as it is not allocated in a standard NEWDOS diskette.
The ROM file is then modified on the NEWDOS diskette so that the bootstrap loader will select sector 0 to boot the diskette.
Using Superzap the MODELA/III FPDE is again modified to read Track lEH or 30 decimal and the total granules changed to 09H. The normal boot sector (sector 1) is modified with 3 bytes located by the hardware in checking for a TRSDOS or LDOS disk.
The diskette is now configured such that the hardware assumes it is an LDOS diskette with the ROM starting on track 30 decimal, Once loaded the ROM bootstrap boots NEWDOS from sector 0.
-
Construct a new system diskette with a directory on lump 36.
PDRIVE,0,1,DDSL=36,A
COPY,0,1,00/00/00,CBF,FMT,NDP=NEWDOS4P,DPDN=1 - Boot the new system diskette.
-
Create a file called MODELA/III
CREATE MODELA/III:0 -
Using Superzap, page through the directory, from relative sector 360, till the FPDE for MODELA/Ill is located, Modify Bytes 21-24 in FPDE
0000 FFFF to 3900 36DB -
From “NEWDOS READY” copy MODELA/Ill from the TRSDOS 1.3B boot disk to the new NEWDOS disk
COPY MODELA/III:1 :0 SPDN=4 -
Using Superzap locate the MODELA/III FPDE and modify bytes 20-24
Find 3900 360B Change to 3900 1E09 -
Using Superzap “DFS” modify MODELA/III at FRS 53 Relative Byte 39
Find 3E01 D3F2 Change to 3E00 D3F2 -
Using Superzap modify the first sector (360) of the directory (GAT). Change relative bytes 36H to 3BH inclusive to FF (i.e. lump(s) allocated)
25 -
Modify Disk Relative Sector 1 at relative byte 0: Do a “ZTFF” to zero the sector and modify:
Relative Byte 02 ==> 14
Relative Byte 14 ==> 28
Relative Byte 5A ==> CD -
Now the easy part, RESET the 4P holding the “P” and “L” keys, If the ROM fails to load successfully then recheck the FPDE entry and the Sector 1 bytes. If the ROM loads successfully but NEWDOS fails, either partly or completely, then recheck the patch to MODELA/Ill (or perhaps you have accidentaliy written to the wrong part of the system!).
25
NEWDOS/80 System Files and Purposes – Art McAninch
DOS Routines
NEWDOS/80 v2.0 Other-DOS PDRIVE Settings – Phill Walsh – March 17, 1985
I have recently had to ‘tidy up’ a friends Model III discs which brought me to a documentation study of the PDRIVE functions of NEWDOS/80 as I found myself faced with the problem of compatibility between TRSDOS, DOSPLUS, LDOS and (my favourite) NEWDOS/80 V.2. This document examines SOME of the methods NEWDOS/80 V.2 uses to overcome these problems with its library command ‘PDRIVE’.
The reason we can’t read DOSPLUS and LDOS double density discs is that they have strayed from the norm. The ‘norm’ in the computer industry appears to be whatever the programmer/designer decides that it will be at the time of their current project. It would take approximately 5K of program to allow NEWDOS/80 to read their type of double density directory. Whilst either one will read between a double or single density Model I or Model III of their own type, they do not have the ability to read one of the others. Therefore if you have some DOSPLUS or LDOS files and wish them on NEWDOS/80, copy them to single density discs and then set up the PDRIVE table as example #1 in the following table. This will allow NEWDOS/80 to read and copy them onto a NEWDOS/80 system or formatted data disc. One thing that you may not be aware of at first is that you are not limited to two letters in the ‘TI’ spec of PDRIVE. The manual states:
“TI = etc., Where TI consists of one or more alphabetic letter flags chosen from, etc.”
This means one or MORE alphabetic letter flags can be used in the ‘TI’ spec. Even though all the examples given therein consist of one or two – you can have three if so required. Example 6 in the manual displays:
PDRIVE,dn1,dn2,TI=AK,TD=E,TC=39,SPT=18,TSR=3,GPL=2,DDSL=17, DDGA=2
This specification is for the Model III for 13.3cm disc, 40 tracks, double density, single-sided disc that has track zero formatted in single density. Now by just altering the TI=AK to TI=AL, you have the same specification except that you can read that same 40 track disc in an 80 track drive.
Some examples of PDRIVE tables:
Example 1 – Allows you to read LDOS single density discs as is, and DOSPLUS single density discs (after WRDIRP) that are 40 tracks.:
PDRIVE,0,9,TI=A,TD=A,TC=40,SPT=10,TSR=3,GPL=2,DDSL=17,DDGA=2
Example 2:
This spec will allow you to copy any known file from a Model III TRSDOS disc. You still will not be able to read the directory, as the TRSDOS directory is not compatible with any other marketed system. You can read the TRSDOS directory in one of two manners:
Boot up the TRSDOS disc and call up the directory, or better still, call up ‘SUPERZAP’ go into ‘DD’ that contains the TRSDOS disc and (display drive relative sector 306), you can even MOD sectors. This will display the directory and other sectors whilst in NEWDOS/80 using the above PDRIVE setup.
PDRIVE,0,8,TI=AM,TD=E,TC=40,SPT=18,TSR=3,GPL=6,DDSL=17,DDGA=2
Example 3 – This spec tells your Model III that you are looking at a Model I NEWDOS/80 disc that is double density with track zero in single density.
PDRIVE,0,7,TI=AK,TD=E,TC=39,SPT=18,TSR=3,GPL=2,DDSL=17,DDGA=2
Example 4 – This is the standard Model III setup except that you can read the 40 track disc in an 80 track drive:
PDRIVE,0,6,TI=AL,TD=E,TC=40,SPT=18,TRS=3,GPL=2,DDSL=17,DDGA=2
Example 5 – This spec is the same as example #1 (LDOS read) except that you can read it in an 80 track drive:
PDRIVE,0,5,TI=AL,TD=A,TC=40,SPT=10,TSR=3,GPL=2,DDSL=17,DDGA=2
Example 6 – This one is the same as example #2 (TRSDOS III) except that the disk is read in an 80 track drive:
PDRIVE,0,4,TI=ALM,TD=E,TC=40,SPT=18,TSR=3,GPL=6,DDSL=17,DDGA=2
Example 7 – This is the standard setup for an 80 track drive on the Model III:
PDRIVE,0,3,TI=A,TD=E,TC=80,SPT=18,TSR=3,GPL=2,DDSL=17,DDGA=2
Example 8 – This is the 40 track standard setup:
PDRIVE,0,2,TI=A,TD=E,TC=40,SPT=18,TSR=3,GPL=2,DDSL=17,DDGA=2
Example 9 – Read a Model 4 TRSDOS 6.x or a Model III LDOS:
PDRIVE,0,2,TI=A, TD=E, TC=40, SPT=18, TSR=3, GPL=6, DSL=12, DGA=2
One small pointer. If you have two drives on your system, set up the ‘SYSTEM’ options command of ‘AL=2’. This will give you use of the other seven PDRIVE tables as a storage area for the tables that you are likely to be using at different times. If you have three drives, set ‘AL=3″. When you need a different drive option, you only type “PDRIVE,0 1=7” and presto, you are ready. By resetting the ‘AL’ function, you not only gain the extra storage space, but your system need not go looking for a file on a drive that doesn’t exist. This actually increases your disk I/O time – sure not by much, but every nanosecond counts.
Setting HIMEM from NEWDOS/80 v2.0 BASIC
Regardless of what the documentation says, high memory cannot be set using a CMD “HIMEM,(decimal address)” command. The string storage area is still going to the top of 48k, even though you may have set HIMEM at 34000.
The only way to set high memory from BASIC is to place a poke at the beginning of the program – before any string or variable definitions are made. To calculate the poke values needed, find the beginning address of the routine. Divide this number by 256. The most significant (MSB) byte of the address will be the integer value of your answer. Multiply the decimal portion of the answer by 256 to find the least significant byte (LSB). On a Model I or III:
POKE 16561,LSB : POKE 16562,MSB: CLEAR 50
This will reset all pointers, and set memory to address calculated. The CLEAR 50 can be what ever value you need for your program. It is not necessary – and wasteful to clear more memory than needed.
Note – String garbage collection will be done at fewer intervals when the maximum amount of memory has been cleared.
Model III Self-Booting Disk using NEWDOS/80 – by Leonard Yates (with help from Gary Bryce)
Back in the August 1984 issue of SYDTRUG NEWS, Gary Bryce presented an article on creating self-booting disks using NEWDOS/80. The Model I mods worked well but,as he said at the end of the item, had not been verified on the Model III. Well, to get a Model III data disk to self-boot, you’ll have to proceed as follow (I’ll make this complete so you don’t have to refer to the original article):
- FORMAT a data disk and copy the /CMD file to be made self-booting to it. If it’s the only file on the disk (apart from BOOT/SYS and DIR/SYS), chances are it will have only one extent (as revealed by DIR dn1 A). If it has more than one extent, it’s probably more than 32 granules long (Super Utility 3.2 is the longest program I’ve been able to self-boot).
- Using the DFS option of SUPERZAP, enter the filename of the file to be self booted. A screen will come up with DRS on the left side of the screen. Note that DRS of relative sector 0 of the /CMD file on the data disk. If it is the only file, it should be 05H
- Next, using the DD option of SUPERZAP, and responding with the drive number and DRS noted above, record the TRS and TRK (in HEX) of the /CMD file on the data disk. If this is the only file, they will likely be 05H and 00H.
-
Using the DFS option again, zap FRS 1 of BOOT/SYS (of the data disk) as follows:
Byte 05 – TRS of /CMD file (will be 05H if it’s the only file on the disk).
Byte 06 – TRK of /CMD file (will be 00H if it’s the only file on the disk).
Byte 3E – change from C8H to C9H.
Note: If the /CMD file is the only USR file on the data disk, TRS will be 05H and TRK will be 00H. BOOT/SYS is normally set up to load SYS0/SYS which always occupies from sector 05 of track 0; for a nonsystem (data) disk, the first USR file will occupy this space. Note also that on NEWDOS/80 system and data disks for the Model III, sector 1 of BOOT/SYS is a duplicate of sector 0 (required for booting on the Model III) These changes are made to sector 1 only. Further, if your /CMD program is the only USR file on the data disk, the only zap needed is to byte 3E of FRS 1 of BOOT/SYS. - Mount the self-booting data disk on drive 0 and press RESET. The disk will BOOT and the /CMD file will load and execute.
Trading Files Between LDOS6.2 and NEWDOS/80 v2.0 – Chris Anderson
One of the things I quickly discovered as I began working with my new Model 4P was that there was going to be a need to move data back and forth between my old NEWDOS disks and LDOS6 disks. The following procedure is very straightforward, and will work without hassle for those important data files.
Note: The following procedure requires at least two drives!
NEWDOS/80 V2 to LDOS6.2
- Boot under LDOS6.2.
- Format a disk SSSD, 35 tracks. You MUST use single side, single density and 35 tracks, regardless of the type of drive you are actually using!
- Boot NEWDOS/80 V2. (Note, if you are a 4P owner, and are having problems booting NEWDOS, see the info file on this topic)
- Set the PDRIVE for the drive where the LDOS disk resides to TI=A,TD=A,TC=35,SPT=10,GPL=2,DDSL=17,DDGA=2.
- Use the normal NEWDOS/80 Copy command to copy the file from your NEWDOS/80 disk to the LDOS disk.
- Reboot the system using LDOS6.2.
- Use the RESET command or TSK/CMD if you have several copied files) to CLOSE each of the copied files. NEWDOS is not familiar with the open/closed status, and will leave each file open when copying it over to LDOS.
LDOS6.2 to NEWDOS/80 V2:
- Boot in 6.2
- Format as noted above. Then, copy files as desired to the newly formatted disk while still in LDOS.
- Boot NEWDOS/80.
- Set PDRIVE as noted above.
- Use normal NEWDOS/80 copy command to move files from the LDOS disk to the NEWDOS/80 disk.